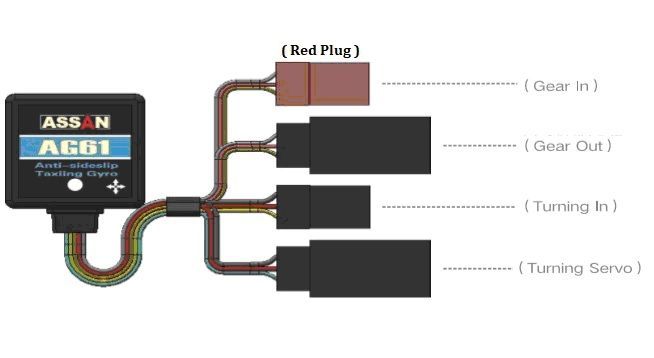
ASSAN AG61 ANTI-SIDESLIP FRONT STEERING GYRO
The AG61 rectifying gyro supports a six-direction installation that allows the bottom surface of the gyro to be installed parallel to the bottom plane of the model airplane (gyro label face up or down), it is also possible to have any one of the four arrows on the gyro label mounted perpendicular to the bottom plane of the model airplane. Use a double-sided adhesive to secure the gyro onto the model plane. And gyros should not be installed very close to the motor or engine.
Setting Steering Wheel Direction
After the installation of the AG61 rectifying gyro connection, power on the model airplane, put down landing gear. The gyro blue LED flashes quick, indicating that the gyro is being initialized. At this time, do not move the model airplane, do not move the transmitter slick ether. After the gyro initialization is complete, the blue LED is on or short flash. When the blue LED is on, move transmitter rudder slick to check whether the front steering wheel is moving in the right direction. That is, when the rudder stick is moved to the left, the front steering wheel should rotate to the left. If not, reverse the rudder channel on the transmitter. Note that if the blue LED flash short after the gyro is initialized, and the steering wheel does not rotate when the transmitter rudder slick is moved, it means that the gyro thinks that the landing gear has been retracted. This requires the gyro to perform the auto config function once (See the next section), so that the gyro correctly recognizes the gear signal and then sets the direction of the steering wheel.
Auto Config
The new installation connection completes or adjusts the installation direction, and adjusts the direction of the rudder channel or the direction of the gear channel, all of which must have the AG61 rectifying gyro perform an auto config function, in order to make the gyro run correctly.
Power on the model airplane, put down landing gear, and keep the model airplane horizontal. Then within one minute after the initialization of the AG61 rectifying gyro is completed, the rudder stick is quickly move to the left end and right end, 5 or more times each (10 or more times in total), and finally, the rudder stick stops at the left end. Hold still, the gyro blue LED flash, indicating the gyro starting auto config. Note that the auto config function will be disable after one minute the gyro is initialized!
If the auto config does not start after the correct operation according to the above method, please temporarily increase the transmitter rudder channel's ATV to 100%, and then auto config again. After the auto config is completed, restore the original setting of the transmitter rudder channel's ATV.
After the gyro blue LED flash 3-5 seconds, the auto config is completed, the gyro can be used normally. If the gyro blue LED always flash and the auto config cannot be completed, please check if the model airplane is horizontally placed, or if the gyro is correctly installed according to the installation direction described in the previous installation section.


